


'%3e%3cpath%20d='M17.5%208.75C17.5%2013.58%2013.58%2017.5%208.75%2017.5C3.92%2017.5%200%2013.58%200%208.75C0%203.92%203.92%200%208.75%200C13.58%200%2017.5%203.92%2017.5%208.75Z'%20fill='%23F56708'/%3e%3cpath%20d='M13.2123%2010.85H12.7048C11.9698%2012.915%2011.5498%2013.125%2010.4473%2013.125H8.22482C7.62982%2013.125%207.27982%2012.8275%207.27982%2012.215V9.065C10.1498%209.065%2010.0098%208.9425%2010.3248%2010.535H10.9023C10.8848%209.9925%2010.8673%209.205%2010.8673%208.6975C10.8673%208.2075%2010.8848%207.4375%2010.9373%206.79H10.3598C10.0448%208.4875%2010.2023%208.33%207.29732%208.3475V4.6025C7.29732%204.4275%207.34982%204.375%207.52482%204.375H10.6573C11.3573%204.375%2011.6898%204.83%2012.0398%206.475H12.5823L12.7573%203.5C11.3748%203.64%2010.4123%203.64%208.73232%203.64C7.03482%203.64%205.59982%203.6225%204.00732%203.5525V4.235C5.26732%204.375%205.40732%204.55%205.42482%205.11C5.45982%205.88%205.47732%207.42%205.47732%208.715C5.47732%2010.0275%205.47732%2011.585%205.44232%2012.3725C5.40732%2012.9325%205.28482%2013.1075%204.02482%2013.2475V13.93C4.75982%2013.8775%206.64982%2013.86%208.36482%2013.86C8.97732%2013.86%2010.1498%2013.825%2012.8623%2013.93L13.2123%2010.85Z'%20fill='white'/%3e%3c/g%3e%3cdefs%3e%3cclipPath%20id='clip0_2416_2431'%3e%3crect%20width='17.5'%20height='17.5'%20fill='white'/%3e%3c/clipPath%3e%3c/defs%3e%3c/svg%3e)
%20scale(1.1)'%20fill='%23FFFFFF'%3e%3cpath%20d='M22.655%208.719c-1.802-1.801-4.726-1.801-6.564%200l-7.351%207.35c-.45.45-.45%201.2%200%201.65.45.449%201.2.449%201.65%200l7.351-7.351c.899-.899%202.362-.899%203.264%200%20.9.9.9%202.364%200%203.264l-7.239%207.239c.9.899%202.362.899%203.263%200l5.589-5.589c1.836-1.838%201.836-4.763.037-6.563zm-2.475%202.437c-.451-.45-1.201-.45-1.65%200l-7.354%207.389c-.9.899-2.361.899-3.262%200-.45-.45-1.2-.45-1.65%200s-.45%201.2%200%201.649c1.801%201.801%204.726%201.801%206.564%200l7.351-7.35c.449-.487.449-1.239.001-1.688zm-2.439-7.35c-1.801-1.801-4.726-1.801-6.564%200l-7.351%207.351c-.45.449-.45%201.199%200%201.649s1.2.45%201.65%200l7.395-7.351c.9-.899%202.371-.899%203.27%200%20.451.45%201.201.45%201.65%200%20.421-.487.421-1.199-.029-1.649h-.021zm-2.475%202.437c-.45-.45-1.2-.45-1.65%200l-7.351%207.389c-.899.9-2.363.9-3.265%200-.9-.899-.9-2.363%200-3.264l7.239-7.239c-.9-.9-2.362-.9-3.263%200L1.35%208.719c-1.8%201.8-1.8%204.725%200%206.563%201.801%201.801%204.725%201.801%206.564%200l7.35-7.351c.451-.488.451-1.238%200-1.688h.002z'/%3e%3c/g%3e%3c/svg%3e)

 linqianyan · June 04, 2026
1. Install Plugin
- Download the plugin file here → download WooCommerce plugin file
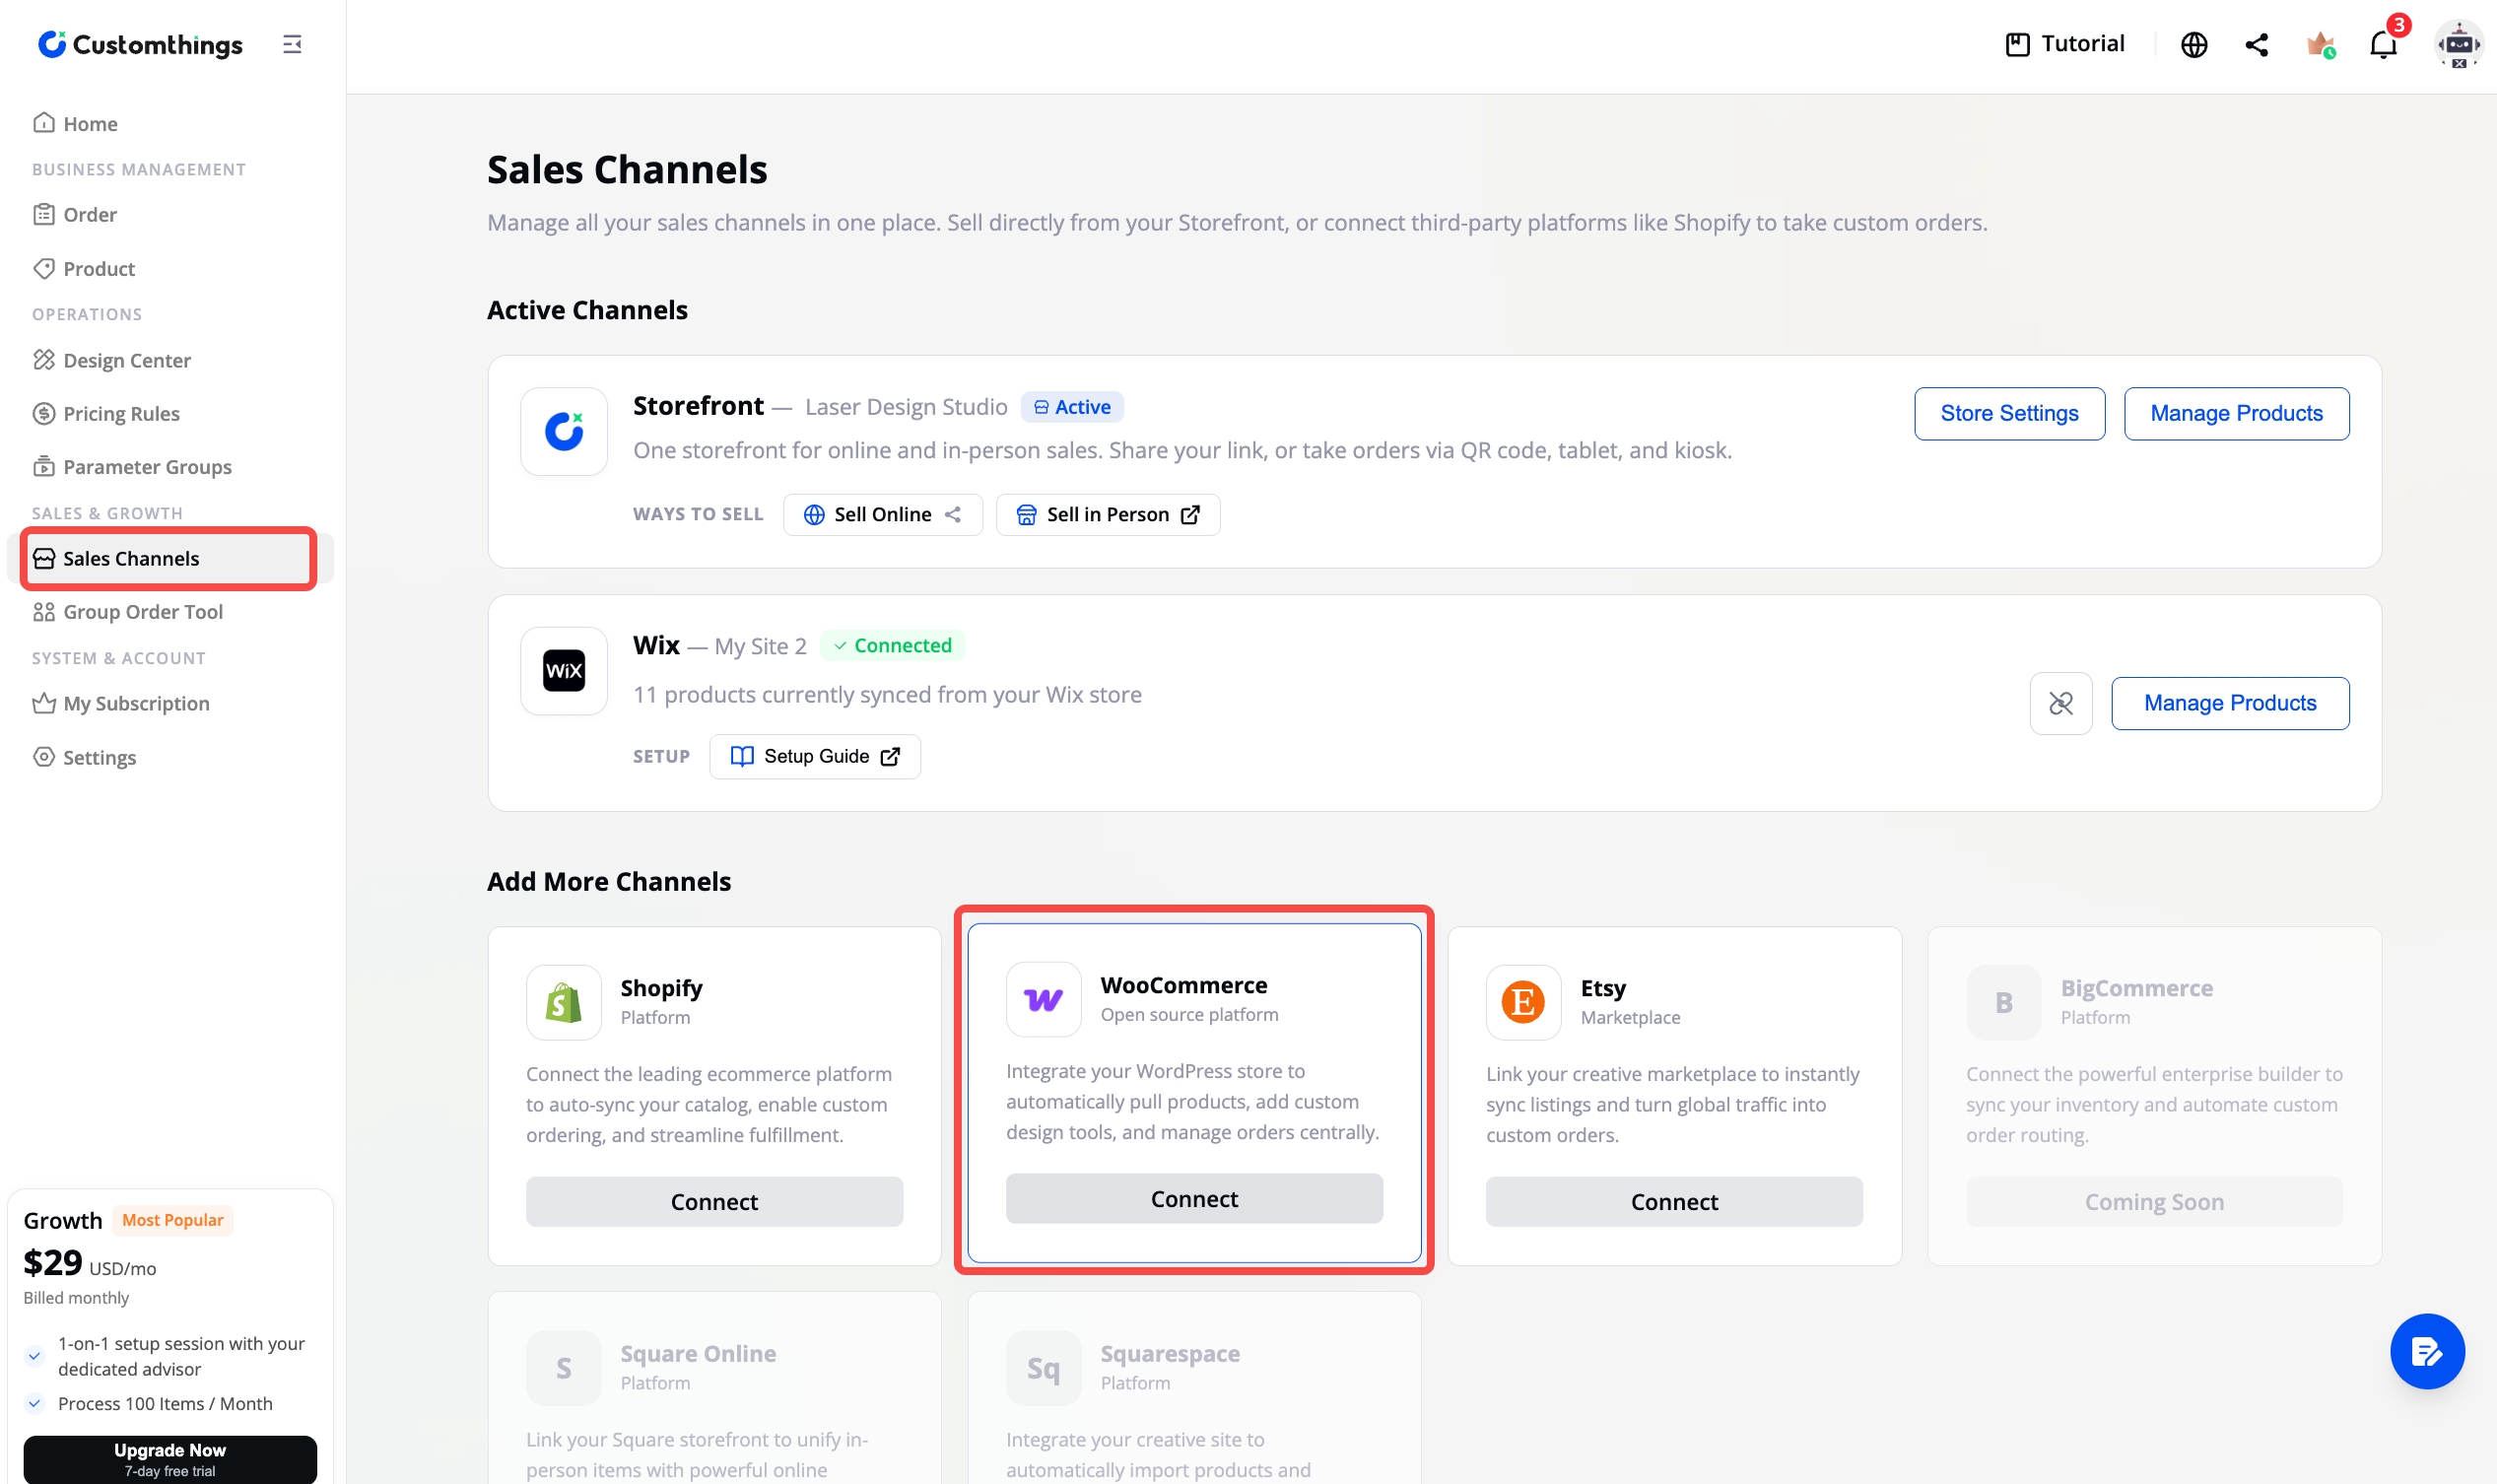
Or go to Sales Channel → WooCommerce → Install Plugin to download the plugin file.
 | 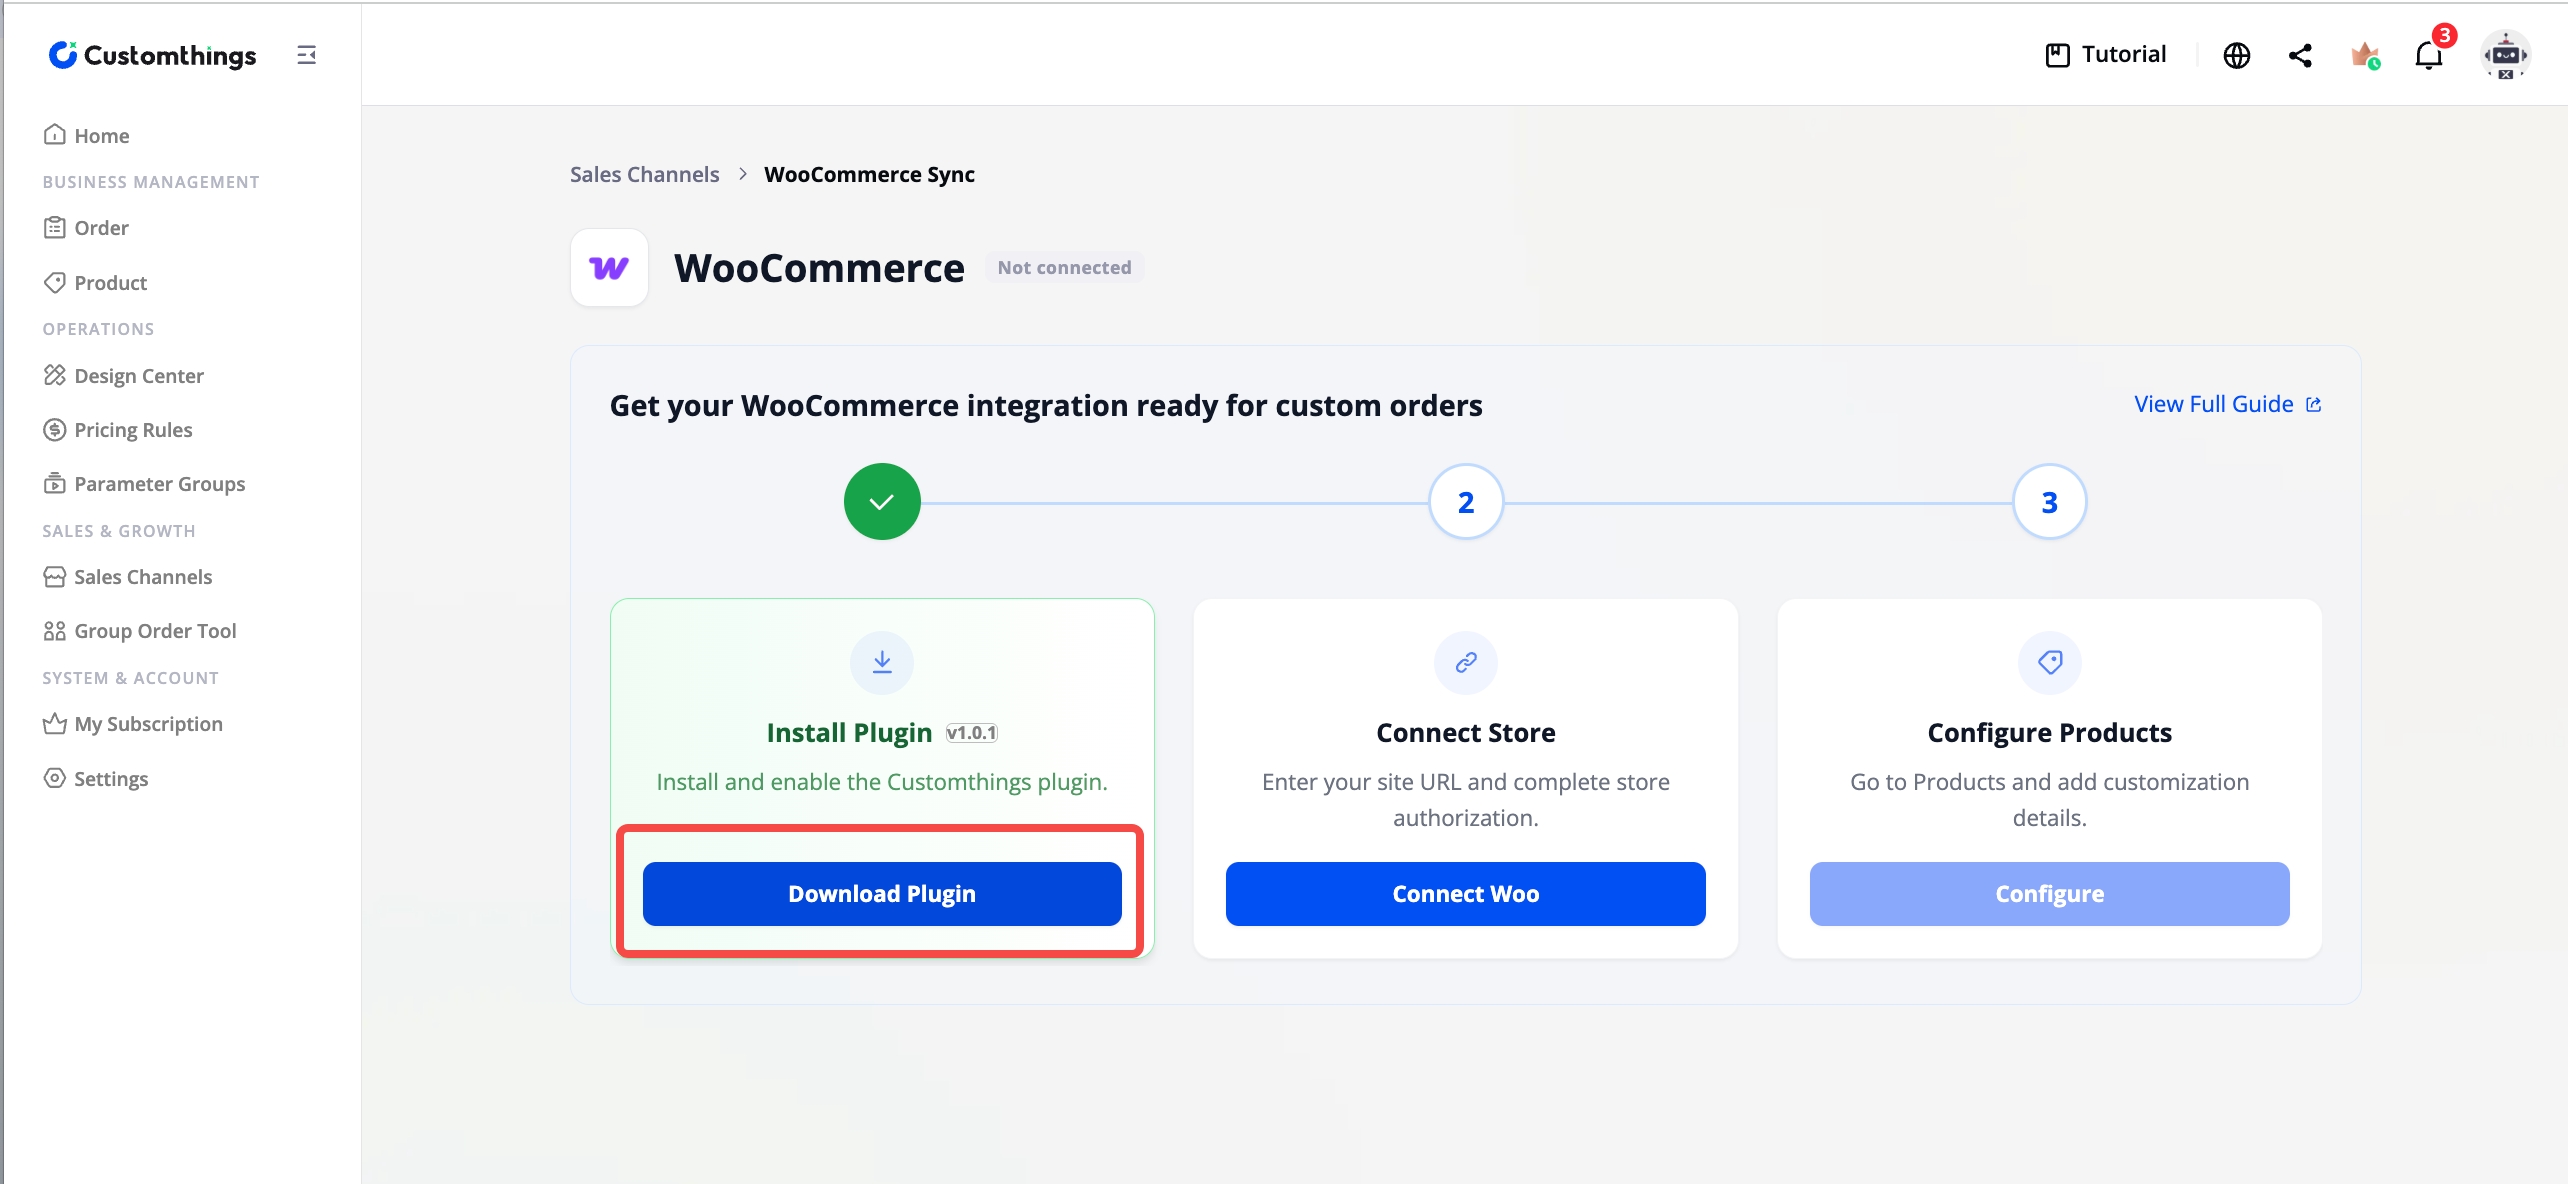 |
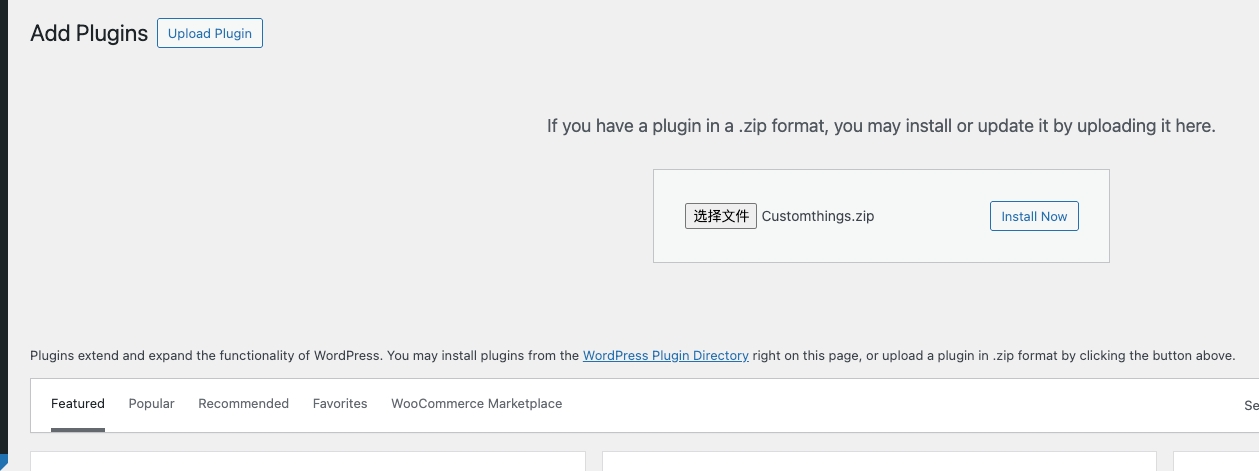
2. Install and activate the Customthings plugin in your WordPress admin.
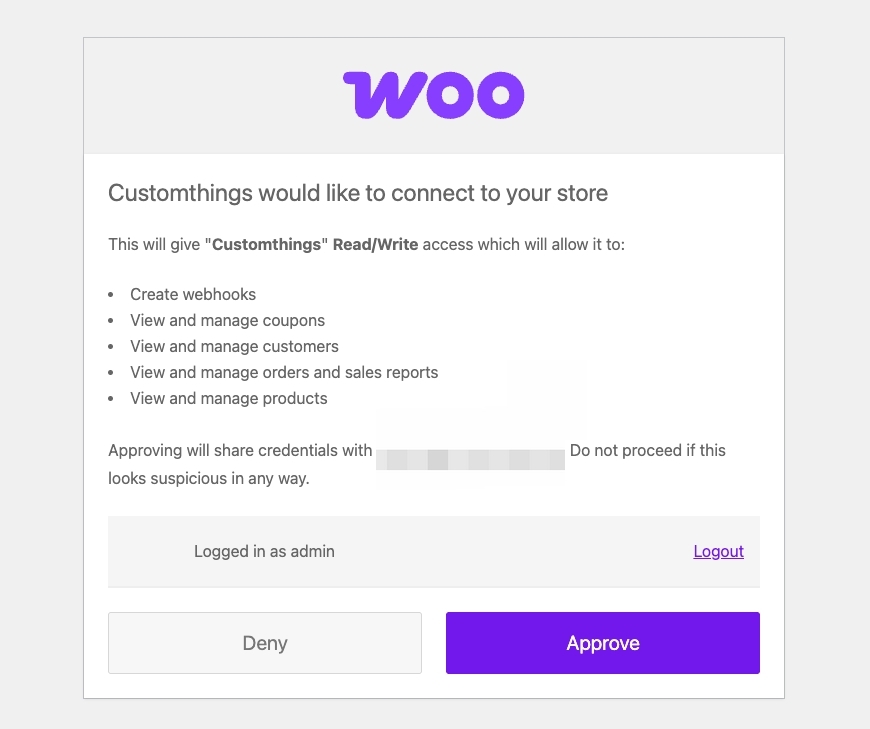
2. Connect Your Store and Authorize
- In your WordPress plugin list, make sure Customthings is shown as enabled. The plugin will automatically embed the "Customize" button on your product listing pages.

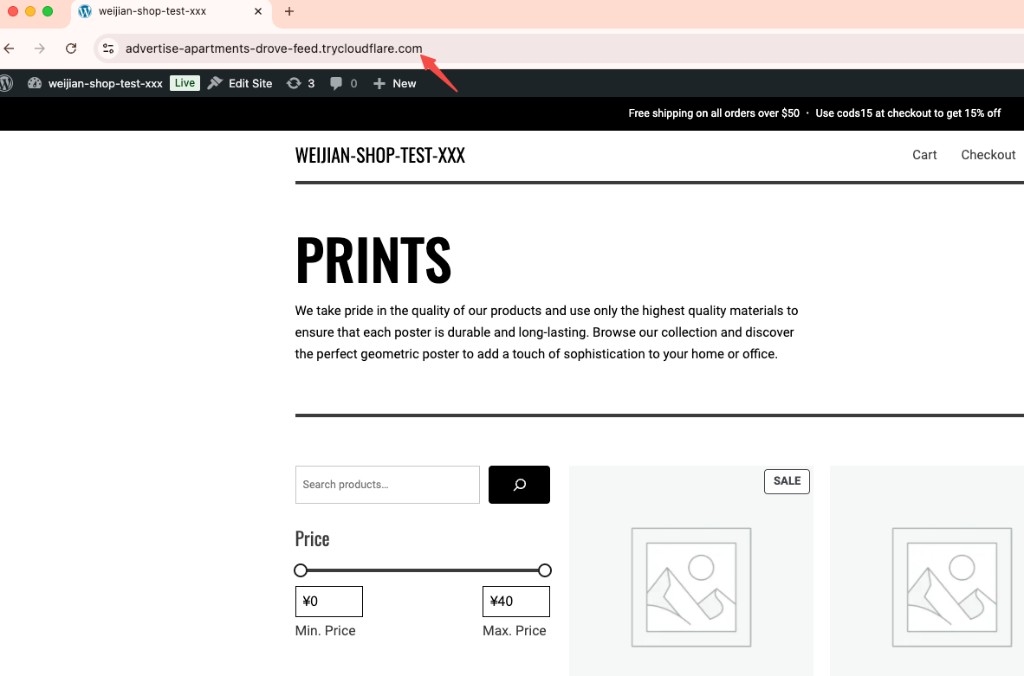
2. Enter your website URL (e.g., https://yourstore.com).

You can copy it directly from the browser address bar.
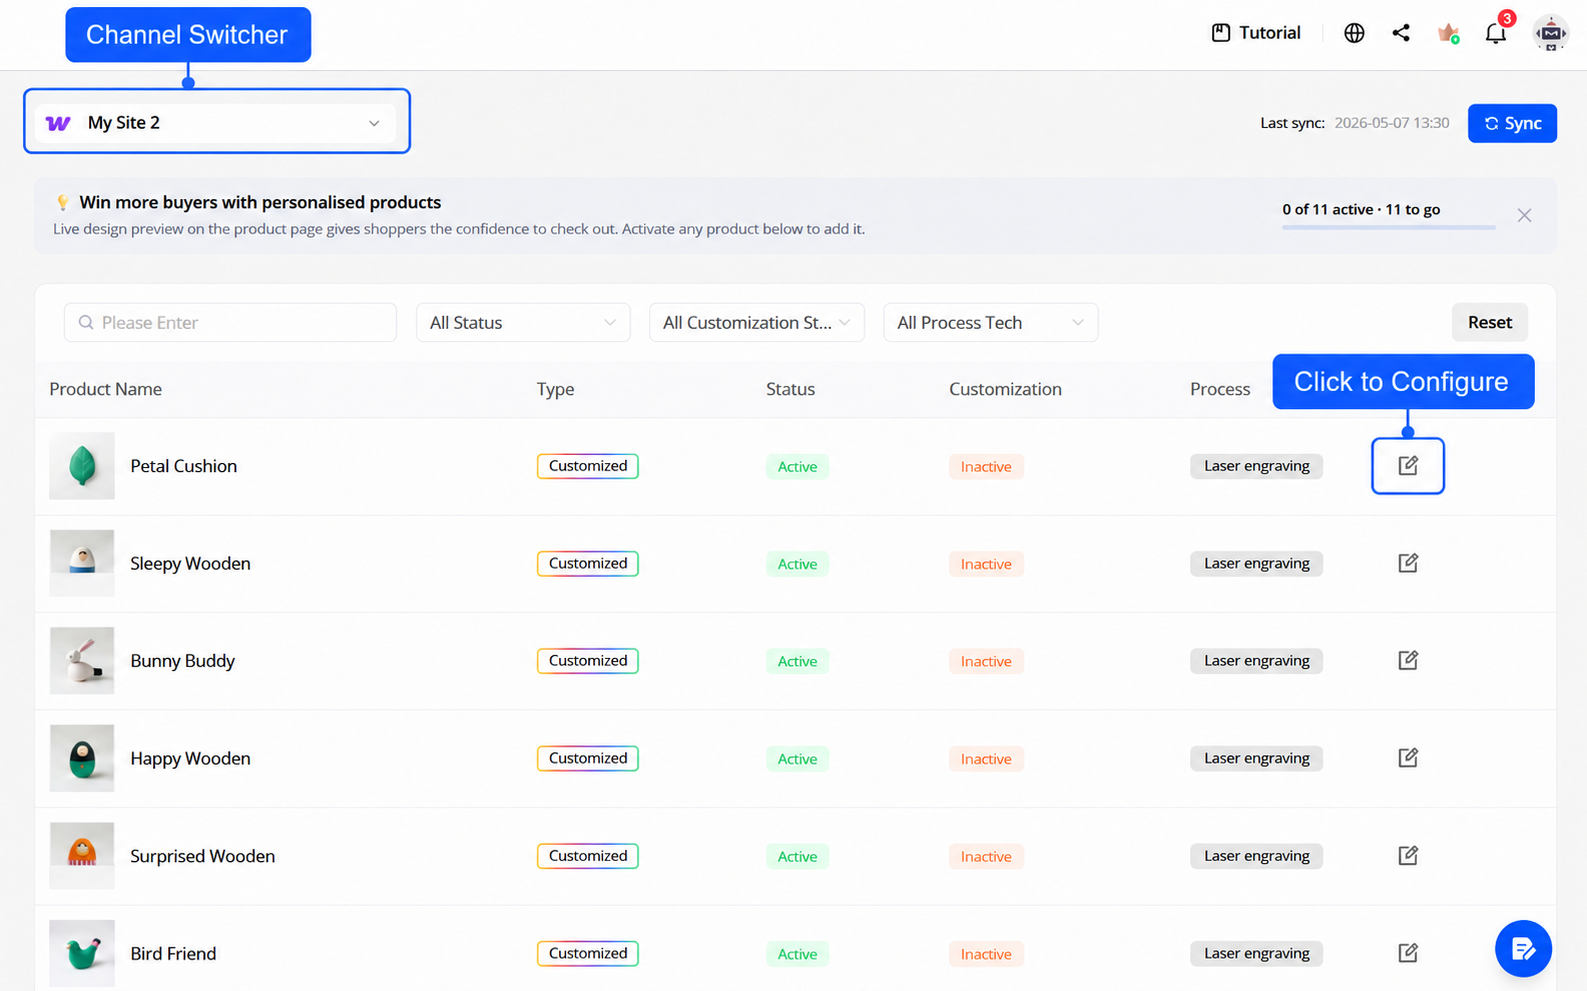
3. Configure Your Products
Once your store is connected and status shows Connected, all your WooCommerce products automatically appear in Customthings.

Go to the Product page, use the channel switcher in the top-left to select your WooCommerce store, and open any product to configure its customizable area, design settings, and processing parameters. Click Publish when done — the customization settings sync to your WooCommerce product automatically.
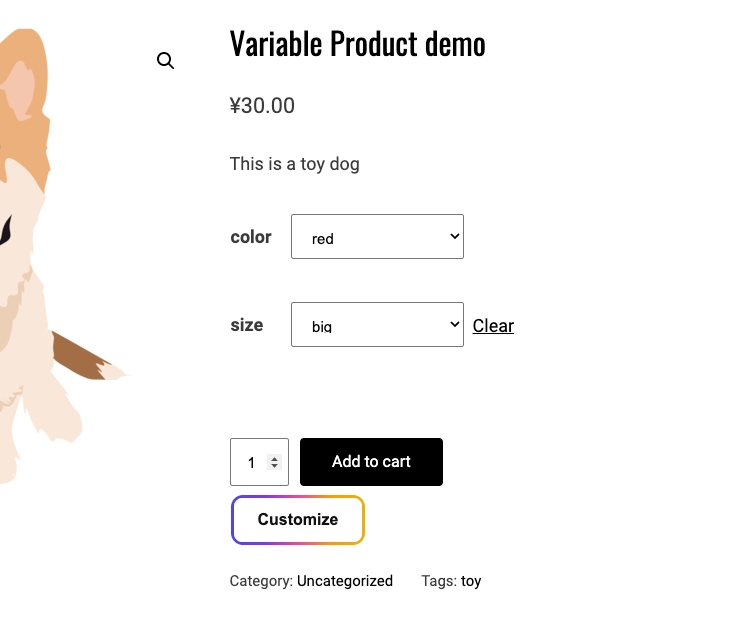
4. Confirm the Customize Button Is Visible
Open a WooCommerce product page on your site. The Customize button should be visible on the product detail page. If it doesn't appear, make sure the plugin is enabled in your WordPress admin and the product has been configured and published in Customthings.
5. Order Sync
After a customer places an order through your WooCommerce store, the order syncs to Customthings automatically. You can process it directly from your Customthings Order page.
Connect Your Woo Store in Customthings Now→
Get Started guides:
Other platform integration guides: