Quick Start Guide to Create a Blank Customized Product
Quick Start Guide to Create a Blank Customized Product
Matt · June 04, 2026
Updated: this guide now reflects the new Wizard-mode product creation flow released in April 2026.
😄Empower your customers to become creators! This guide will walk you through setting up a "Customized" product from scratch, allowing buyers to add their own text, images, and designs to your blank items, while you seamlessly manage the production parameters in the background.
Step 1: Start a New Product
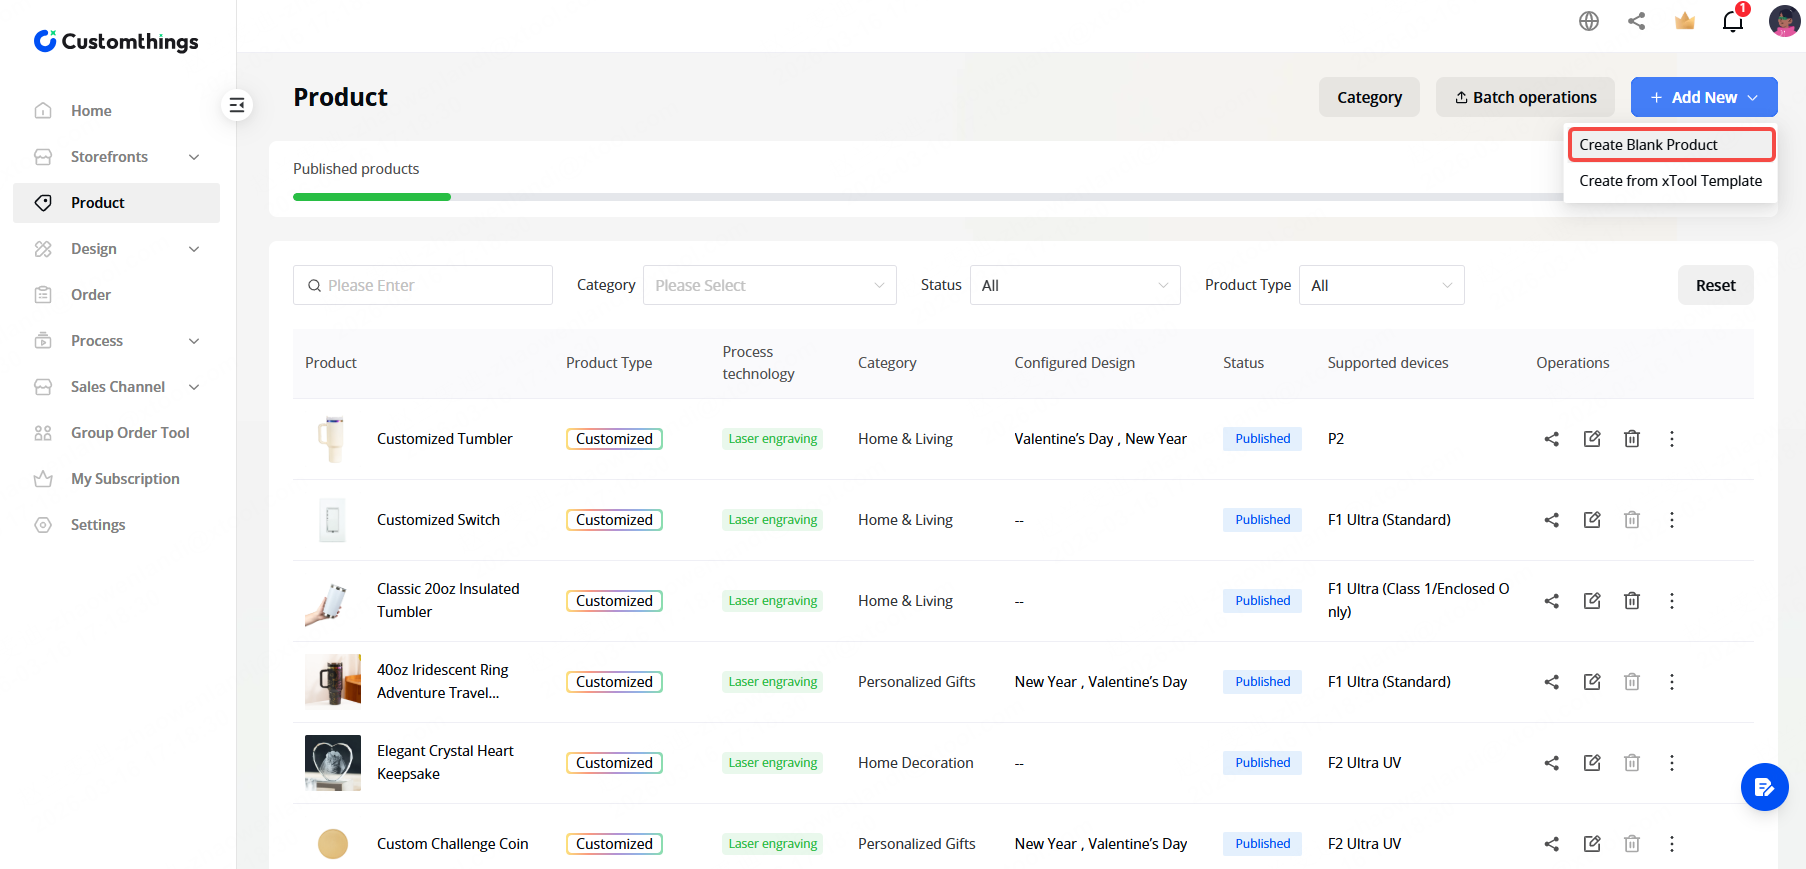
Navigate to Product on the left-hand menu. Click the + Add New button in the top right corner and select Create Blank Product from the dropdown menu.
When you open Create Blank Product, you'll land in Wizard mode by default. This new flow splits product setup into four guided steps. If you prefer the old single-page form, click the Single Page Mode tab at the top of the page; you can switch back at any time.
Step 2: Complete Basic Product Information
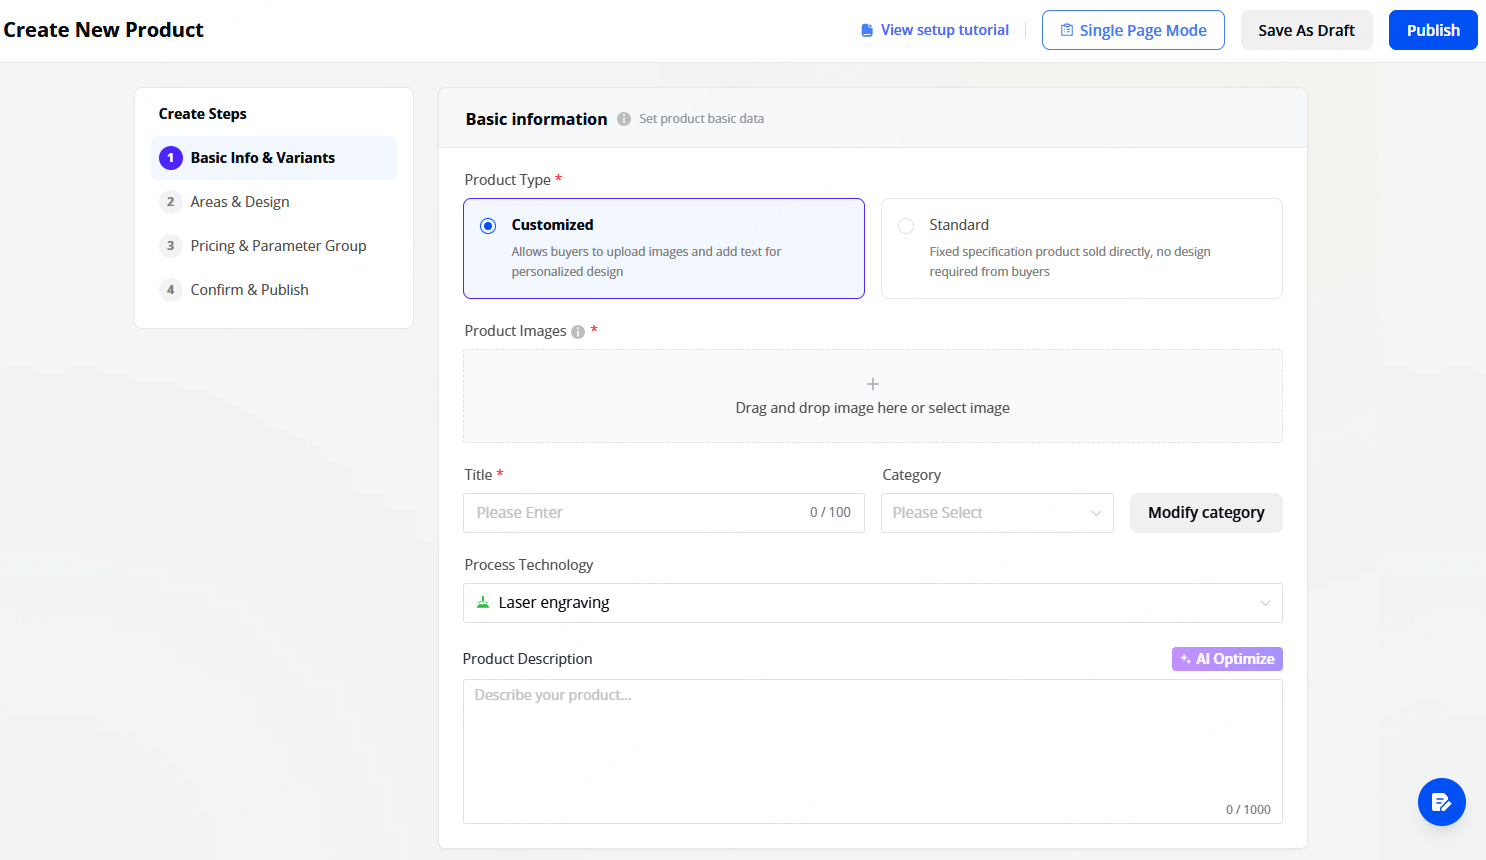
Under the Basic Information section, select Customized as your Product Type. This is crucial as it unlocks the design canvas for your buyers.
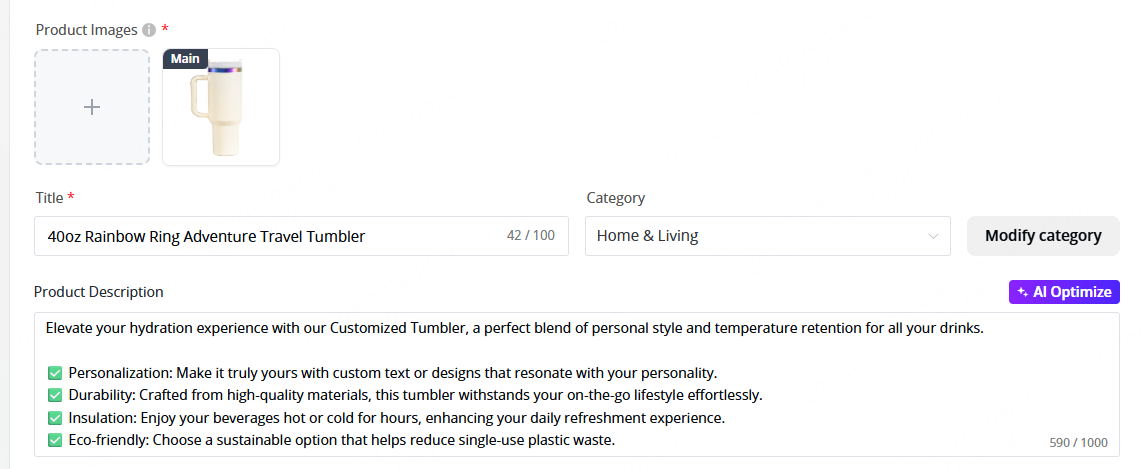
Complete basic information
Fill in your Product Images, Title, Category, and a compelling Product Description (Tip: Use the AI Optimize button to instantly enhance your description!)
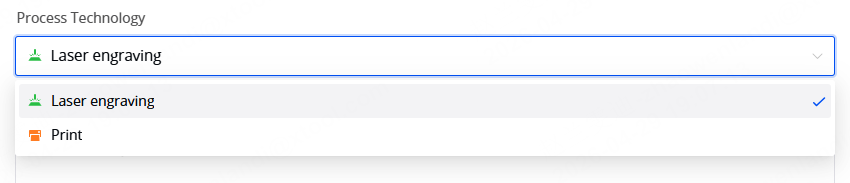
Step 1 of the wizard mode covers the listing basics and now includes the Process Technology selection up front (this used to appear further down the form in Single Page Mode). Picking your process here helps the system tailor the rest of the wizard.
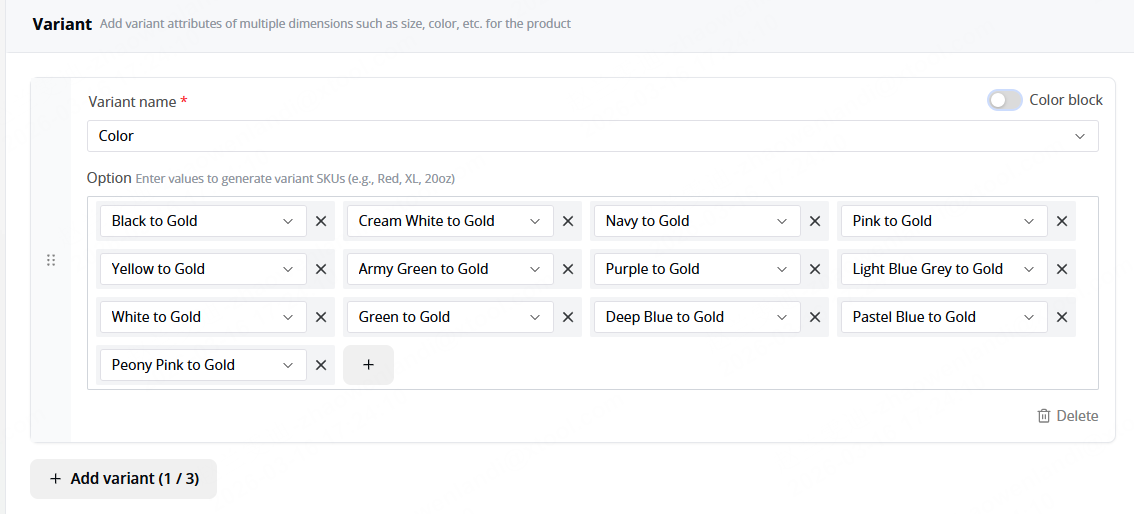
Set Up Product Variants
Scroll down to the Variant section to offer different options for your product, such as size or color. Enter the Variant name (e.g., "Color") and add your specific options (e.g., "Black," "White").
Step 3: Set the Customizable Area
The wizard mode groups everything related to customization in one place: customizable area, per-variant pricing (if you use variable pricing), and design settings.
Upload the Design Base Image
In the Customizable area section, upload a Design Base Image for each variant. This serves as the blank canvas that your customers will see and design on.
Set Product Height and Width
Enter the height and width of the product to enhance efficiency, define the customizable area with accurate measurements. This data will be used to ensure designs fit within the product's physical limits and streamline production.
Define a clear design area and customize color effects
Set the customizable area to prevent designs from exceeding the product's dimensions. This ensures accuracy and improves production efficiency. Customize color effects for text, handwriting, and other elements within the designated area.
Configure Advanced Customization (Optional)
If your product has multiple engravable surfaces (like the front and back of a tumbler), toggle on Advanced Customization. Select Customized By Side, define your sides (e.g., "Front"), and assign the corresponding base images to each specific area.
💡Tip:Batch applies to the same variants
Use the "Applied to" icon to quickly apply one base image to all relevant variants with a single click, saving you setup time.
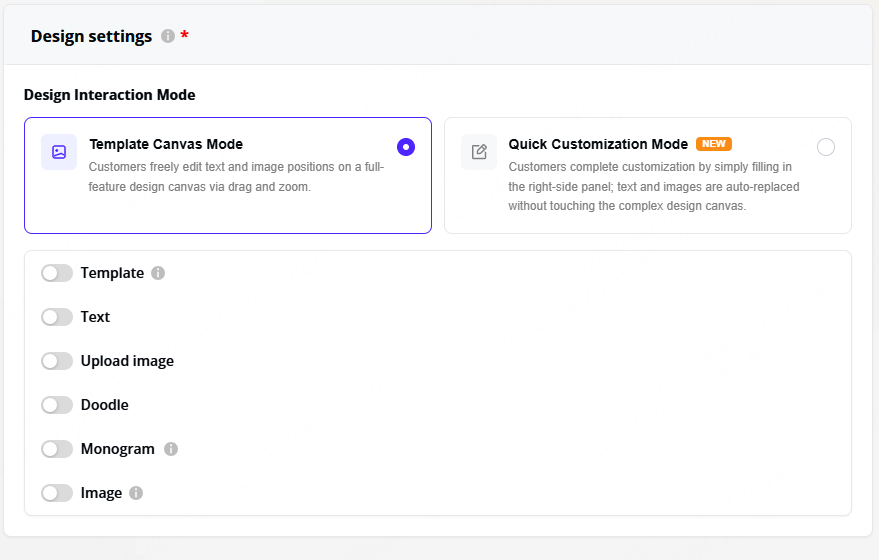
Step 4: Define Buyer Design Settings
NEW: Design settings now offer two modes. Pick the one that matches how you want customers to design.
Canvas Mode (the original mode)
Canvas Mode gives the customer a full editor inside your customizable area. You decide which tools to enable: Template, Text, Upload Image, Monogram, Doodle, AI Style Filters. Customers can add elements freely and arrange them however they want, as long as everything stays inside the customizable area.
💡Tip: Use Canvas Mode when you want to give customers room to be creative, or when designs vary widely from order to order.
Toggle on the features you want to offer, such as Template (to offer pre-made designs like "Valentine's Day"), Text, Upload image, or Doodle.
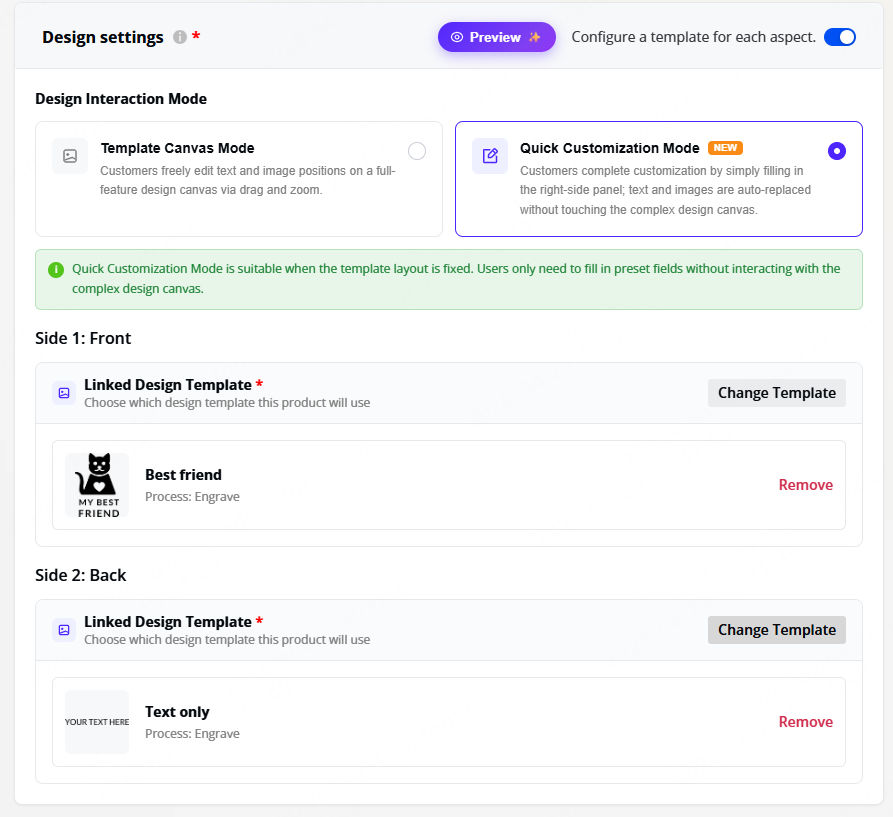
Quick Customization Mode (new)
Quick Customization Mode is built for ecommerce-style flows where consistency matters more than creative freedom. Instead of a blank editor, you choose a Template from your Design Center. The template's layout becomes the design; the customer fills it in like a form, swapping the text and images you've marked as editable.
When you build the template (in the Design Center), you decide:
Which elements customers can edit (e.g., open the headline text, lock the background)
How much they can change (character limits, image swap libraries with up to 20 options, etc.)
On the storefront, the template fills your customizable area automatically. Customers see a tidy form ("Edit text," "Choose image") instead of a blank canvas, which speeds up checkout and keeps designs on-brand.
Only the Template option is configurable in Quick Customization Mode for now. If you want to upload more templates for your customer, learn more about 'templates' in this article
Step 5: Set Pricing and Processing Parameters (Optional)
Pricing
If you use variable pricing, attach a pricing rule here. Skip this if you only use fixed product prices.
Learn more about how to set up Pricing Rules in this article.
Processing Parameters
Pre-configuring parameters means each order arrives in xTool Studio ready to process in one click. If you skip this step, you can still import the design file into xTool Studio and set parameters there manually.
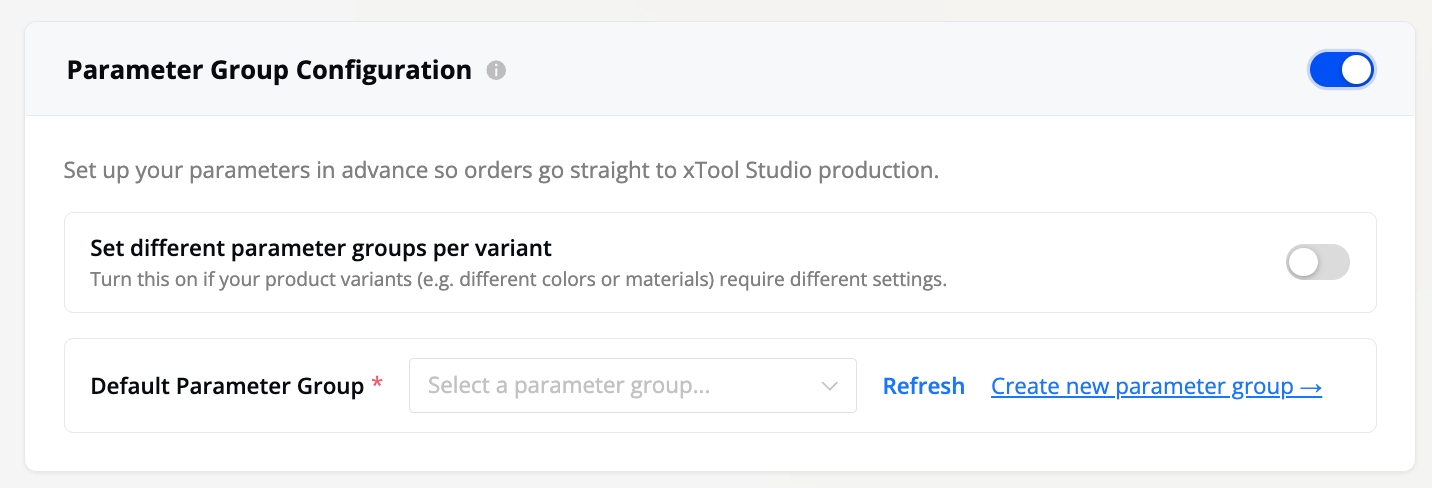
Processing parameters used to live in a single "Processing Info" section. The new flow introduces Parameter Groups, which let you set parameters once and reuse them, or assign different parameters per variant when materials or colors change between SKUs. Two ways to use Parameter Groups:
Single parameter group: one set of parameters applies to every variant. Use this when the whole product is made from the same material.
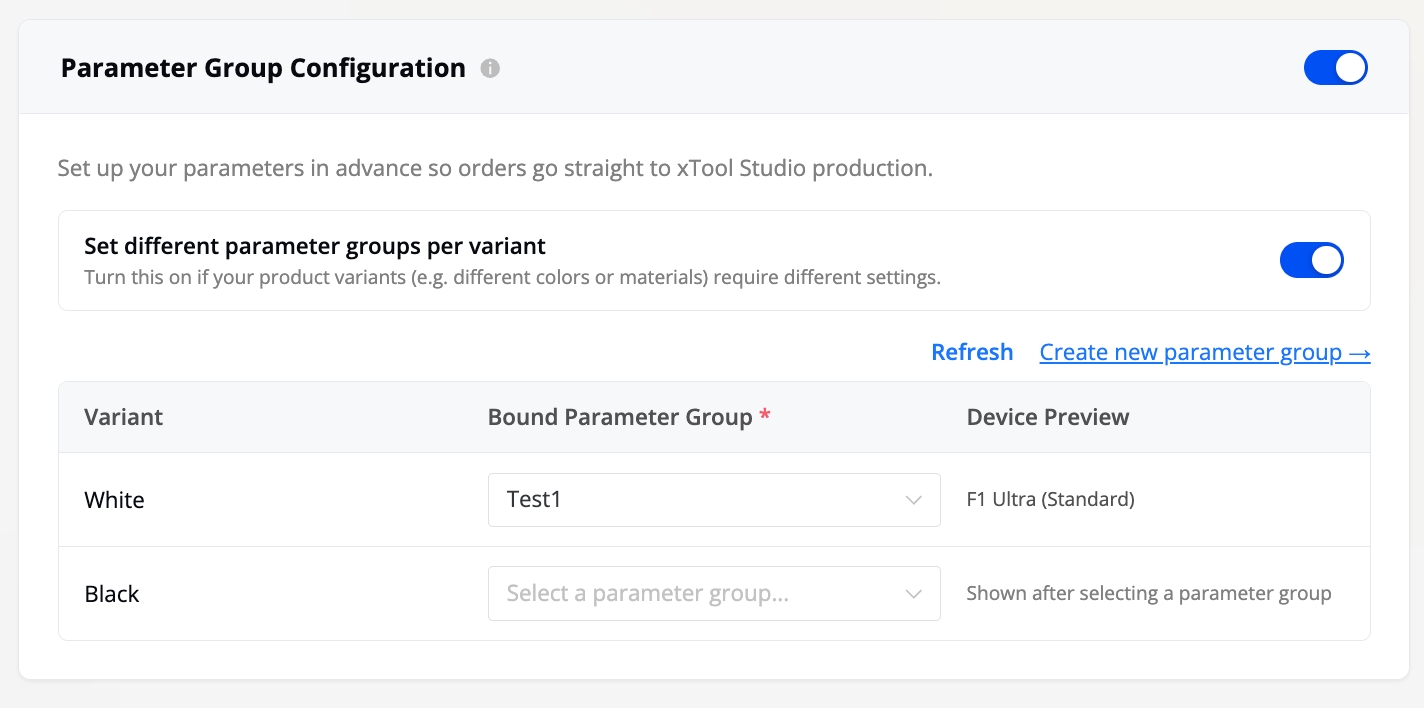
Per-variant parameter groups: toggle this on if you have variants in different materials (e.g., walnut and acrylic). Each variant gets its own dropdown to assign a parameter group.
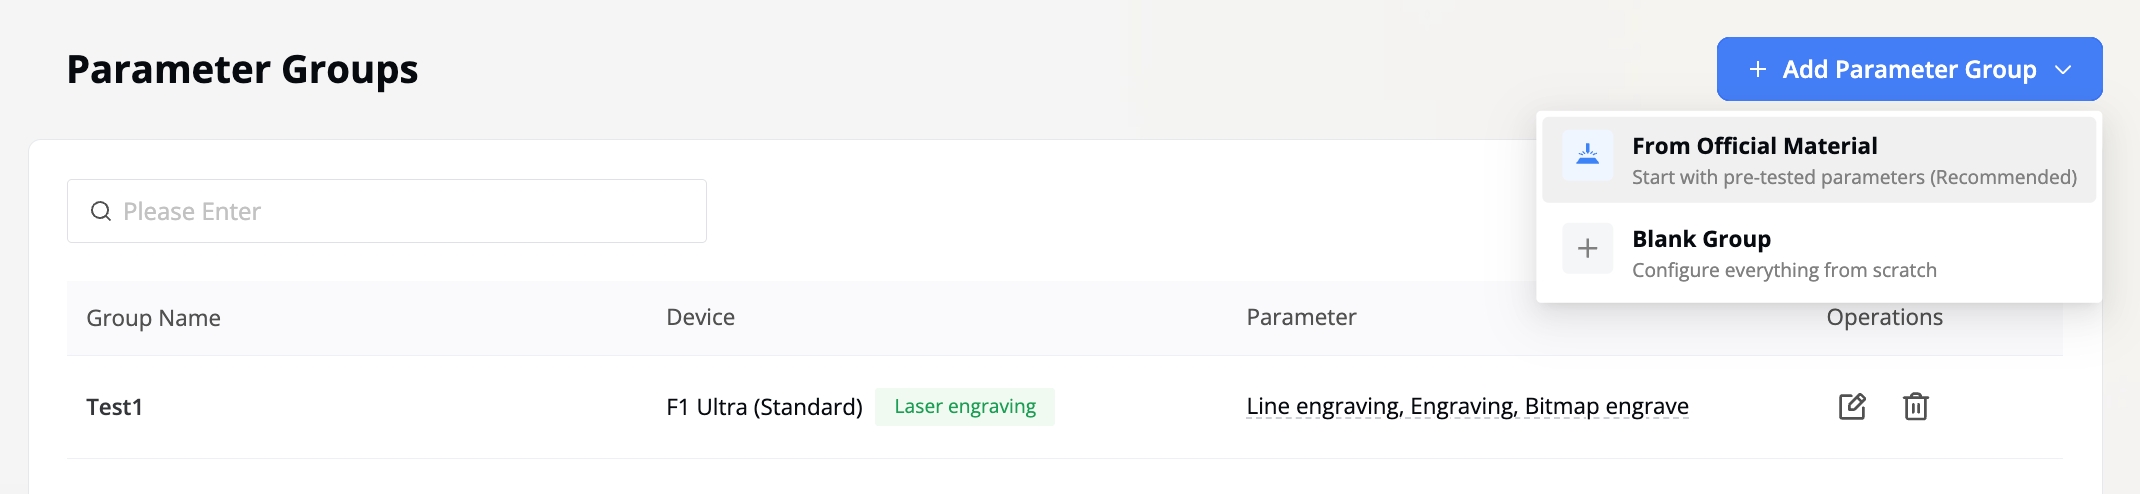
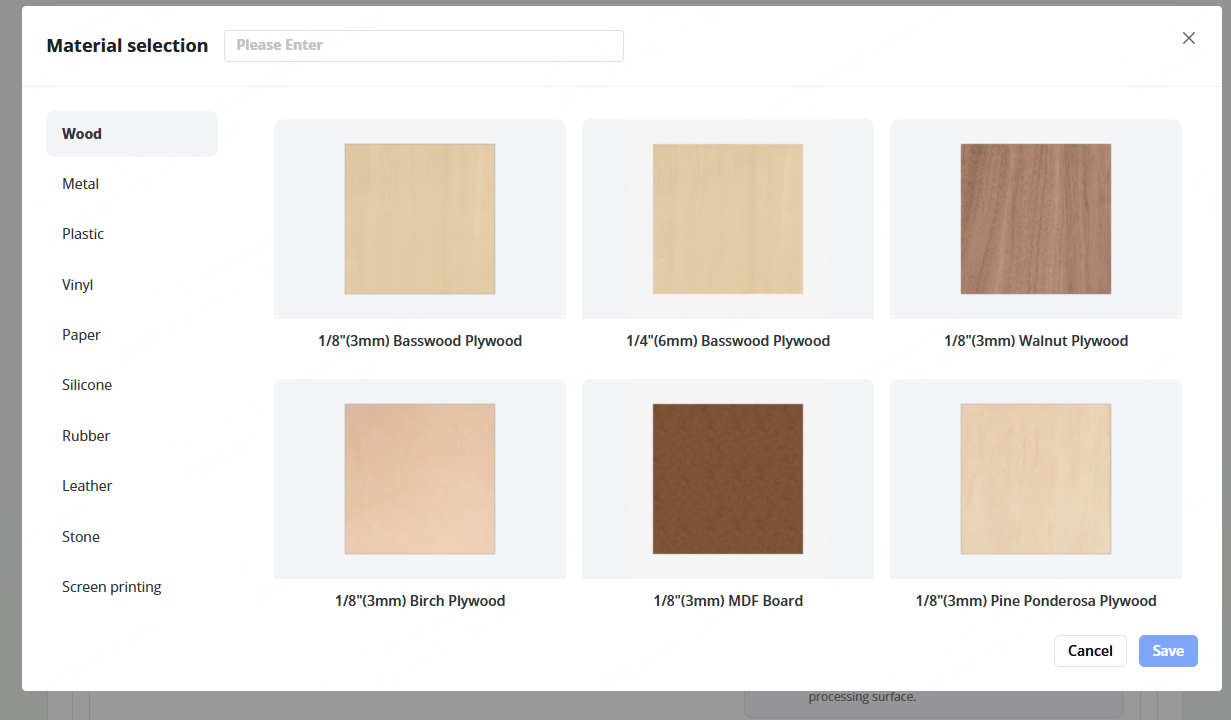
When you create or edit a parameter group, pick your machine model, then either enter the parameters by hand or click Official Material Library to pull xTool's tested settings for your material.
You can also set the start point of the processing area (where the design lands on the xTool Studio canvas).
Step 6: Publish, Review, and Share Your Products
When you reach the final step, the wizard checks your setup. Required fields that are still empty get flagged with a prompt that links you back to the relevant step. Optional fields you skipped are listed too, in case you want to fill them in.
Once all your settings and parameters are configured, click Publish in the top right corner to make the customized product live on your store, or click Save As Draft to come back to it later.
Once published, you can share your customizable product with your customers via link, QR code, or directly share to your social media.
You're All Set! Your customizable product is now live. You're all set. When an order comes in, the buyer's design pairs with your pre-set parameters, so fulfillment is one click away.


'%3e%3cpath%20d='M17.5%208.75C17.5%2013.58%2013.58%2017.5%208.75%2017.5C3.92%2017.5%200%2013.58%200%208.75C0%203.92%203.92%200%208.75%200C13.58%200%2017.5%203.92%2017.5%208.75Z'%20fill='%23F56708'/%3e%3cpath%20d='M13.2123%2010.85H12.7048C11.9698%2012.915%2011.5498%2013.125%2010.4473%2013.125H8.22482C7.62982%2013.125%207.27982%2012.8275%207.27982%2012.215V9.065C10.1498%209.065%2010.0098%208.9425%2010.3248%2010.535H10.9023C10.8848%209.9925%2010.8673%209.205%2010.8673%208.6975C10.8673%208.2075%2010.8848%207.4375%2010.9373%206.79H10.3598C10.0448%208.4875%2010.2023%208.33%207.29732%208.3475V4.6025C7.29732%204.4275%207.34982%204.375%207.52482%204.375H10.6573C11.3573%204.375%2011.6898%204.83%2012.0398%206.475H12.5823L12.7573%203.5C11.3748%203.64%2010.4123%203.64%208.73232%203.64C7.03482%203.64%205.59982%203.6225%204.00732%203.5525V4.235C5.26732%204.375%205.40732%204.55%205.42482%205.11C5.45982%205.88%205.47732%207.42%205.47732%208.715C5.47732%2010.0275%205.47732%2011.585%205.44232%2012.3725C5.40732%2012.9325%205.28482%2013.1075%204.02482%2013.2475V13.93C4.75982%2013.8775%206.64982%2013.86%208.36482%2013.86C8.97732%2013.86%2010.1498%2013.825%2012.8623%2013.93L13.2123%2010.85Z'%20fill='white'/%3e%3c/g%3e%3cdefs%3e%3cclipPath%20id='clip0_2416_2431'%3e%3crect%20width='17.5'%20height='17.5'%20fill='white'/%3e%3c/clipPath%3e%3c/defs%3e%3c/svg%3e)
%20scale(1.1)'%20fill='%23FFFFFF'%3e%3cpath%20d='M22.655%208.719c-1.802-1.801-4.726-1.801-6.564%200l-7.351%207.35c-.45.45-.45%201.2%200%201.65.45.449%201.2.449%201.65%200l7.351-7.351c.899-.899%202.362-.899%203.264%200%20.9.9.9%202.364%200%203.264l-7.239%207.239c.9.899%202.362.899%203.263%200l5.589-5.589c1.836-1.838%201.836-4.763.037-6.563zm-2.475%202.437c-.451-.45-1.201-.45-1.65%200l-7.354%207.389c-.9.899-2.361.899-3.262%200-.45-.45-1.2-.45-1.65%200s-.45%201.2%200%201.649c1.801%201.801%204.726%201.801%206.564%200l7.351-7.35c.449-.487.449-1.239.001-1.688zm-2.439-7.35c-1.801-1.801-4.726-1.801-6.564%200l-7.351%207.351c-.45.449-.45%201.199%200%201.649s1.2.45%201.65%200l7.395-7.351c.9-.899%202.371-.899%203.27%200%20.451.45%201.201.45%201.65%200%20.421-.487.421-1.199-.029-1.649h-.021zm-2.475%202.437c-.45-.45-1.2-.45-1.65%200l-7.351%207.389c-.899.9-2.363.9-3.265%200-.9-.899-.9-2.363%200-3.264l7.239-7.239c-.9-.9-2.362-.9-3.263%200L1.35%208.719c-1.8%201.8-1.8%204.725%200%206.563%201.801%201.801%204.725%201.801%206.564%200l7.35-7.351c.451-.488.451-1.238%200-1.688h.002z'/%3e%3c/g%3e%3c/svg%3e)

 Matt · June 04, 2026